
Technical Specifications
Installation Instructions, Videos, and Product Documentation
Everything your crew needs to install TriLite manufactured stone veneer the right way. Below you’ll find printable installation instructions, step-by-step videos, and detailed guidance for our Super-Stak Mortarless Stone.
These resources back 36 years of supplying contractors, builders, and masons across Minnesota and the Upper Midwest. Have a question the documentation doesn’t cover? Reach our team directly and we’ll walk you through it.

Installation Videos
A set of instructional videos walks through each step of applying TriLite manufactured stone. Watch scene by scene, or view the full 14-minute faux stone demo from start to finish.
Printable Installation Instructions
Download and print the full instructions to keep on the jobsite.
Super-Stak Mortarless Stone Installation
Follow these steps for a straight, watertight Super-Stak install:
Prepare the wall.
Confirm a house wrap is installed first. For added moisture protection, apply 30 lb. tar paper (felt) over the house wrap with stain-free fasteners when placing on treated wood.
Flash the corners and base.
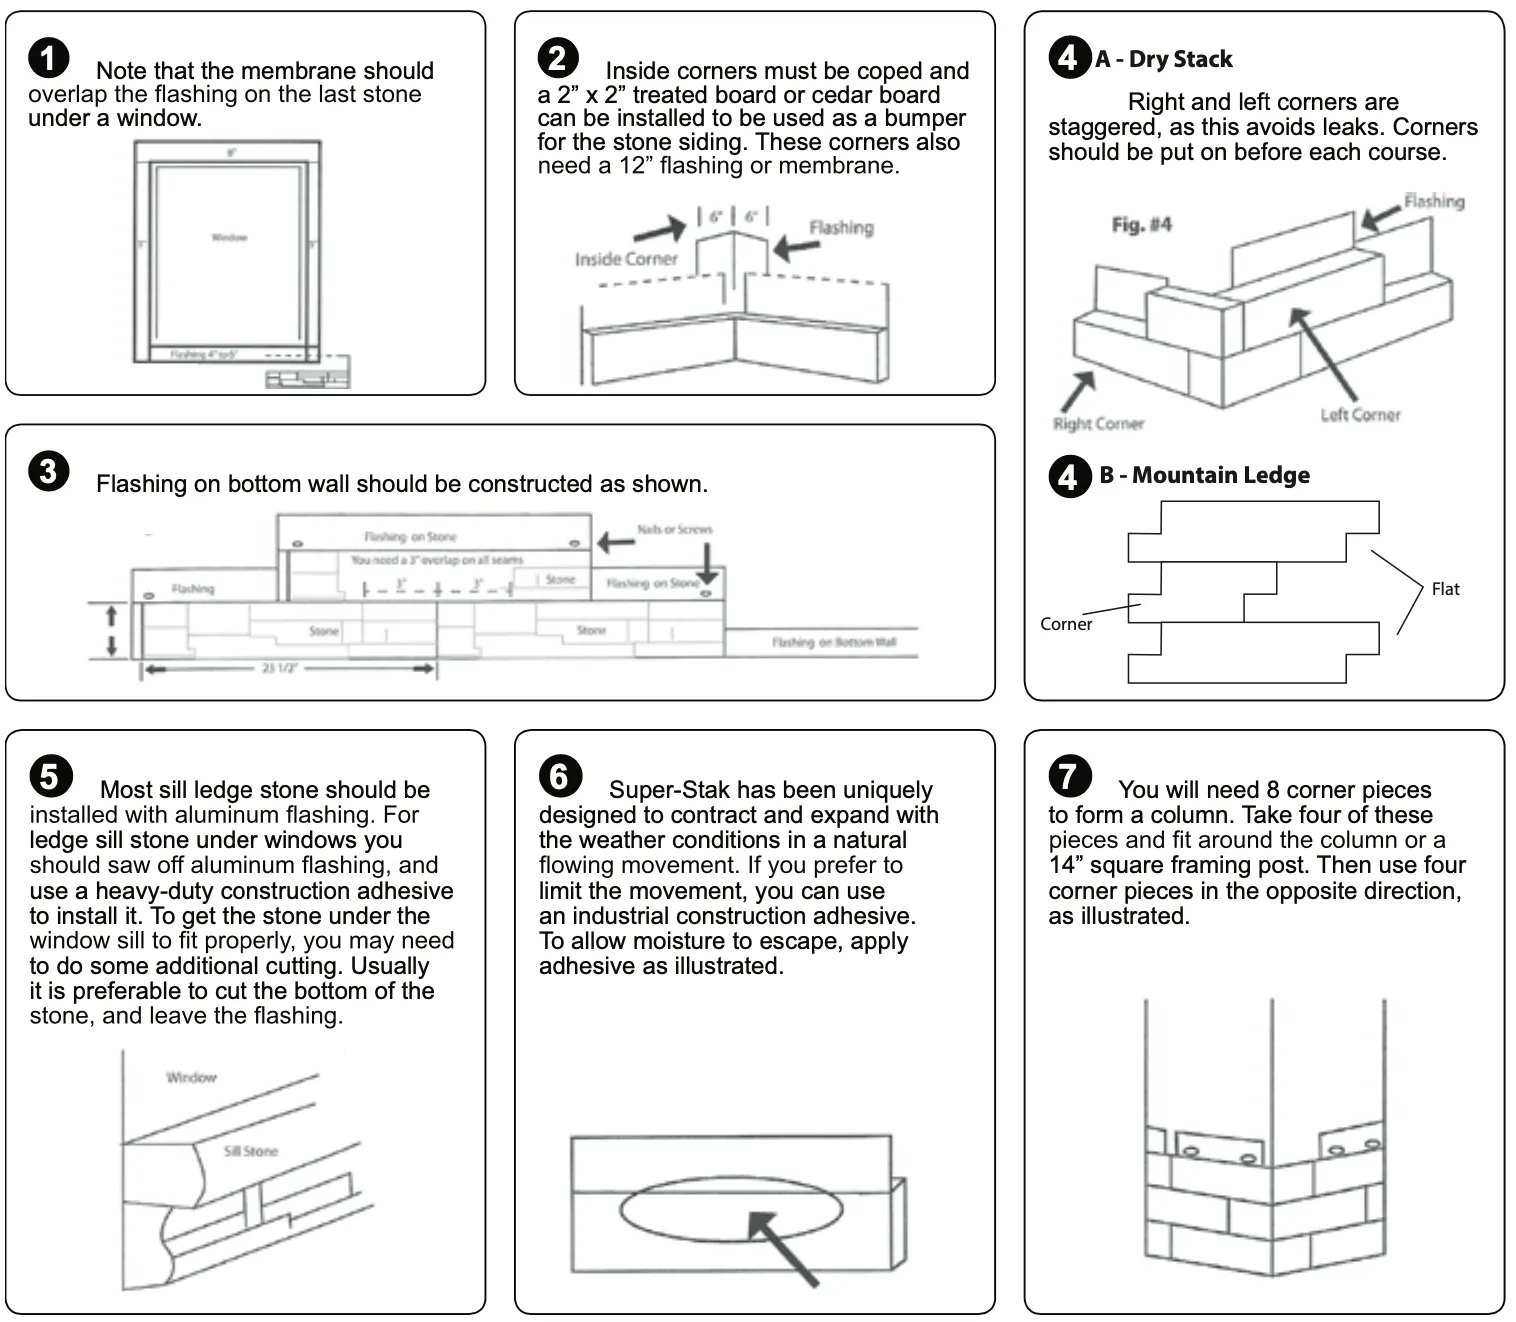
Wrap inside and outside corners with 12-inch self-adhesive aluminum flashing or waterproof membrane (Figure 2). Add eight inches of waterproof membrane or aluminum flashing along the bottom edge of the building (Figure 1).
Set a level base course.
Once all membrane and flashing is in place, follow the Lap Stone Installation method and begin at the base. A straight, level first course is the key to clean placement for every panel above it. Two options help:
- Tack a 2×4 as a starter base to set the first course on a level plane, check each panel for consistency, then remove the 2×4.
- Use a level to apply a 10′ J-weep as a starter strip, placing the bottom edge of the DD paper in the upturned hook of the channel. Once the base is level, strike chalk lines every 6 inches up the wall to keep each course straight and speed up the install.
Handle corners.
For dry-stack corners, alternate the short and long legs on the left and right to keep a seam from running up the wall (Figure 4A). At least one fastener from each stone must hit a stud. Use stainless steel fasteners 1-1/2″ to 2″ long. Thanks to the interlock design, Mountain Ledge corners can pair with a full flat piece, alternated every other course, to stagger the seam up the wall (Figure 4B).
Flash the windows.
Run flashing around windows from the bottom up. The bottom flashing should overlap the top flashing on the last section of stone. Install side flashing after the bottom flashing, overlapping it to create a watertight seal.
Questions on a Spec or Install?
Our team answers product, color, and installation questions directly. Reach out before your next job and we’ll make sure your crew has what it needs.